
Open Visual Studio and choose "File", "New", "Project..." in the main menu. Choose "WPF Application" as project type. Choose a folder for your project and give it a name. Then press "OK"


Open the Window1.xaml file in the WPF designer and drag a Button from the toolbox to the Window

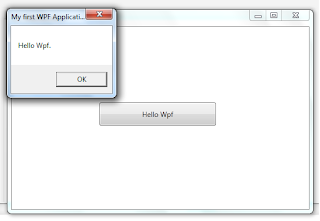
Select the Button and doubleclick on it this create a method in the codebehind that is called, when the user clicks on the button.
*******************************************************************************************************
<Window x:Class="FirstWpfApplication.MainWindow"
xmlns="http://schemas.microsoft.com/winfx/2006/xaml/presentation"
xmlns:x="http://schemas.microsoft.com/winfx/2006/xaml"
Title="MainWindow" Height="350" Width="525">
<Grid>
<Button Content="Hello Wpf"
Height="40"
Width="200"
HorizontalAlignment="Left"
Margin="150,129,0,0"
Name="button1"
VerticalAlignment="Top"
Click="button1_Click" />
</Grid>
</Window>
*******************************************************************************************************
using System;
using System.Windows;
namespace FirstWpfApplication
{
/// <summary>
/// Interaction logic for MainWindow.xaml
/// </summary>
public partial class MainWindow : Window
{
public MainWindow()
{
InitializeComponent();
}
/// <summary>
/// Handles the Click event of the button1 control.
/// </summary>
/// <param name="sender">The source of the event.</param>
/// <param name="e">The <see cref="System.Windows.RoutedEventArgs" /> instance containing the event data.</param>
private void button1_Click(object sender, RoutedEventArgs e)
{
MessageBox.Show("Hello Wpf.", "My first WPF Application", MessageBoxButton.OK);
}
}
*******************************************************************************************************

No comments:
Post a Comment